Tag: angular

  • DevDose: The Real Role of package.json in Your Frontend Project

    DevDose: The Real Role of package.json in Your Frontend Project

    Day Twelve of Devdose

    Introduction:

    I was reviewing a flaky build issue for a new team and noticed something off in their setup. It wasn’t the code, tests, or CI, it was a misplaced dependency in package.json.

    Real-World Issue:

    The project depended on a library only used in the build process, but it was declared as a regular dependency rather than a devDependency. On a clean install, the library triggered a version mismatch on production servers where it wasn’t needed at all. We lost half a day debugging an issue that didn’t belong in runtime.

    Concept:

    "dependencies": {
      "zone.js": "^0.13.0"
    },
    "devDependencies": {
      "@angular-devkit/build-angular": "^17.0.0"
    }

    Knowing where a package belongs matters. Dependencies ship with your production bundle. Dev dependencies do not.

    Insight:

    Treat package.json like a contract. It declares what your project needs to run, build, and test. Misplacing packages pollutes production environments and slows teams down.

    I now review this file line by line when joining a new repo. It’s one of the quickest ways to understand a team’s discipline.

    Conclusion:

    Every engineer should know how package.json works, not just what it is. It’s more than a config file; it’s your app’s first handshake with the ecosystem.

  • DevDose: Understanding Angular’s ngOnInit in the Component Lifecycle

    DevDose: Understanding Angular’s ngOnInit in the Component Lifecycle

    Introduction

    Angular’s component lifecycle is a cornerstone of building robust applications, and understanding hooks like ngOnInit is critical for predictable behavior. This post dives into ngOnInit’s role, inspired by a recent project where lifecycle misuse led to subtle bugs.

    Real-World Example

    In a dashboard application, I encountered a component fetching data in its constructor, causing inconsistent UI updates. The constructor, meant for dependency injection, isn’t ideal for initialization logic. Moving the logic to ngOnInit resolved the issue, ensuring the component was fully instantiated before executing setup code.

    import { Component, OnInit } from '@angular/core';
    import { DataService } from './data.service';
    
    @Component({
      selector: 'app-dashboard',
      templateUrl: './dashboard.component.html'
    })
    export class DashboardComponent implements OnInit {
      constructor(private dataService: DataService) {}
    
      ngOnInit(): void {
        this.displayData         toSignal(this.dataService.fetchData());
      }
    }

    Insight and Reasoning

    ngOnInit is a lifecycle hook called by Angular after the constructor and initial property bindings are set, but before the component’s view is fully rendered. It’s the right place for initialization tasks like fetching data or setting up subscriptions because it ensures the component’s dependencies and inputs are ready.

    Using the constructor for such logic risks premature execution, especially in complex components with asynchronous dependencies. In the dashboard case, ngOnInit ensured data fetching happened at a predictable point, avoiding race conditions and improving testability.

    Conclusion

    Mastering ngOnInit means knowing when and why to use it: post-construction, pre-rendering, for safe initialization. This small shift in approach can prevent subtle bugs and make your Angular components more reliable.

  • DevDose: Build a Minimal Angular Standalone Component Without NgModules

    Day Ten of Devdose

    Introduction

    After years of writing @NgModule boilerplate, I wanted to strip everything down and explore the simplest functional shape of a component using Angular’s standalone API. I was curious about how little was truly needed to render something meaningful.

    Real-world context:

    In a recent prototype, I needed to test isolated UI pieces quickly. Instead of spinning up an entire module structure, I opted to write each component as a standalone unit. The frictionless setup helped validate designs faster without clutter.

    Code example:

    Here’s the most minimal version of a standalone component that renders “Hello world”:

    import { Component } from '@angular/core';
    
    @Component({
      selector: 'app-hello',
      template: `Hello world`
    })
    export class HelloComponent {}
    

    This component can now be used directly in a route, host component, or dynamically loaded. No module required.

    My insight:

    By starting with the absolute minimum, I get a clearer mental model of what Angular actually needs at runtime. I find that building this way leads to more deliberate choices around dependencies, imports, and structure. It also forces me to ask, “Why do I need this?” before adding it.

    Conclusion:

    Standalone components invite you to think in terms of feature boundaries instead of module boundaries. That mindset shift, however small, can reduce cognitive load and improve how teams organise UI code.

  • DevDose: Reflect and Iterate: Two Habits That Sharpen the Craft

    DevDose: Reflect and Iterate: Two Habits That Sharpen the Craft

    Day Six of Dailydose

    I’ve wanted to keep a developer log for years. I always felt it would add a level of professionalism that’s often missing in day-to-day coding. Recently, using GPT to help prompt reflection points finally gave that idea some structure. Just a small bit of research and prompting unlocked something bigger: a habit of daily thinking, not just daily doing.

    I call myself a software engineer rather than a developer or coder, because I hold myself to a professional standard. That includes clean code, testability, proper patterns, and yes, reflection. Whether or not you write a formal log, taking time to think about the decisions you made can uncover gaps and improve your work.

    This isn’t about rewriting everything. It’s iteration. Maybe you used a dumb component where it made sense, wired up DTOs and facades, and just moved on. But when you revisit it, some names no longer make sense, or a pattern you used has evolved. It happens. That doesn’t mean the original code was wrong, but it might mean there’s a cleaner way now.

    What worries me is when developers just get something working and throw it in without a second look. Sadly, I’ve seen that happen more often than I’d like. That lack of reflection leads to brittle systems and technical debt that builds quietly over time.

    Takeaway: Reflecting doesn’t slow you down. It sharpens your decisions. Iterating on your own code, even slightly, is a sign of engineering discipline, not indecision.

    The list Chat GPT provided to assist in daily logging (they were bonus content, nothing I asked for)

  • Craft, Curiosity, and Code: My Approach to Software Engineering

    Craft, Curiosity, and Code: My Approach to Software Engineering

    How I Approach Software Engineering

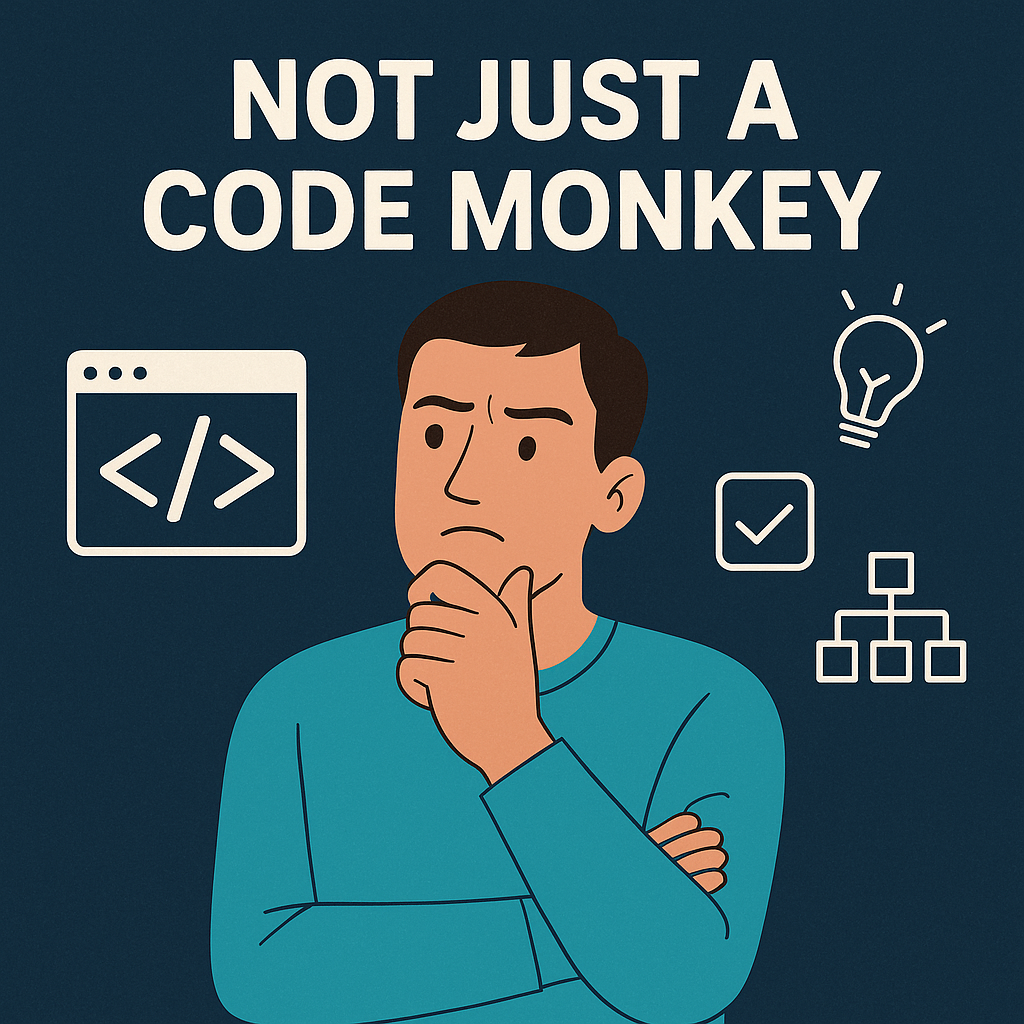
    As a software engineer, my role goes far beyond writing code that compiles. Real engineering is about solving meaningful problems, communicating clearly, and understanding the broader impact of technical decisions. That includes how code behaves, how users experience it, and how it fits into the product’s long-term goals.

    This post is not a résumé or a list of frameworks. It’s a reflection of the habits, principles, and mindset that guide how I work—regardless of the tech stack.

    Strong Foundations That Go Beyond Any Framework

    Some of the most valuable skills I’ve learned aren’t tied to one language or library. Clean code, separation of concerns, testable design, and clear thinking apply whether you’re building in Angular, React, or a backend service. When you understand the patterns and ideas behind the tools, it becomes easier to adapt, improve, and contribute across environments.

    Frontend Expertise (Angular and Beyond)

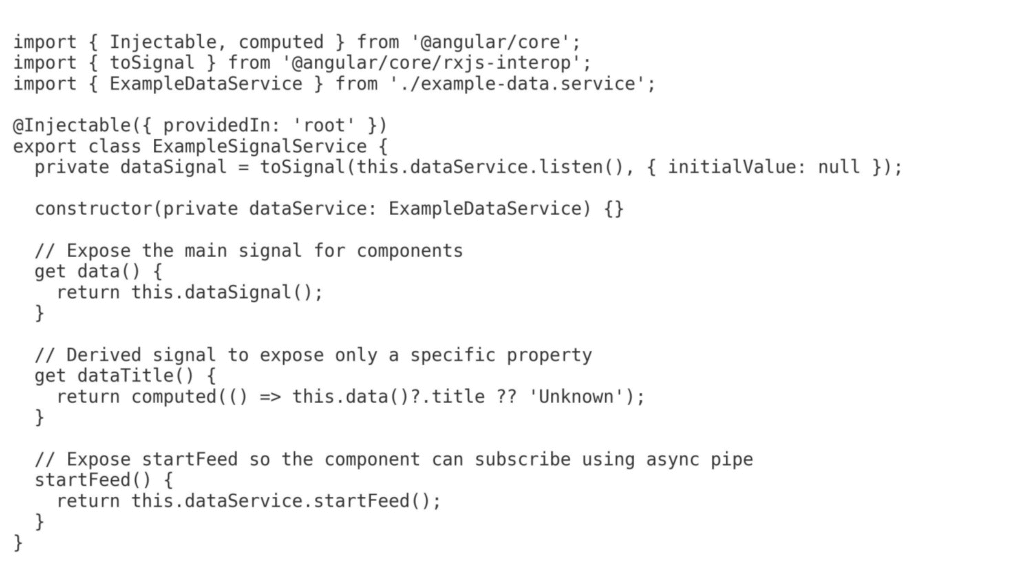
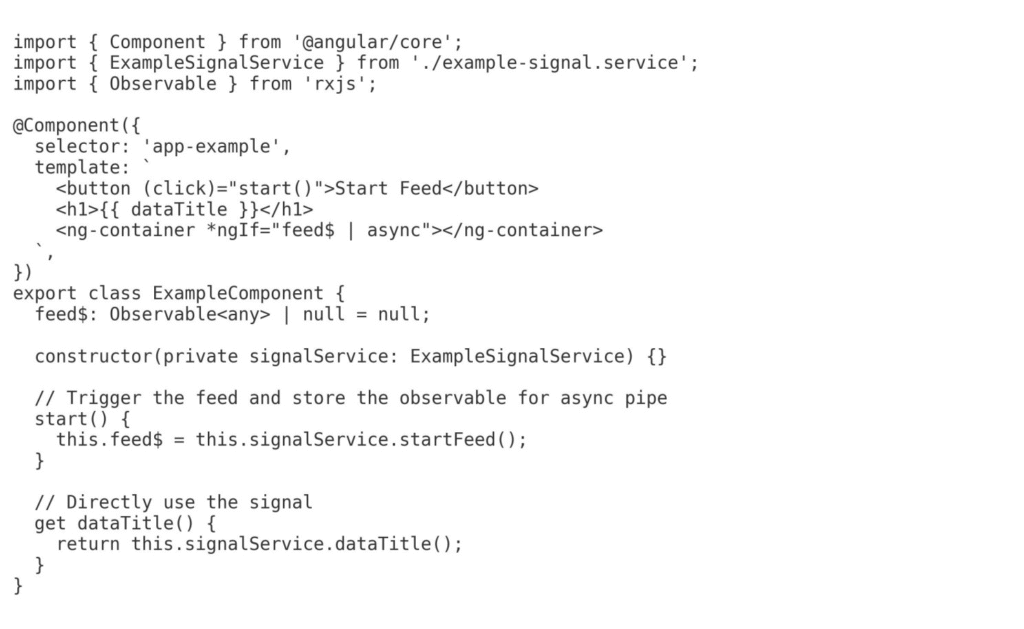
    I’ve worked extensively with Angular, including modern techniques like Signals and Standalone Components. My focus is on building modular, maintainable applications with clear structure and strong reusability.

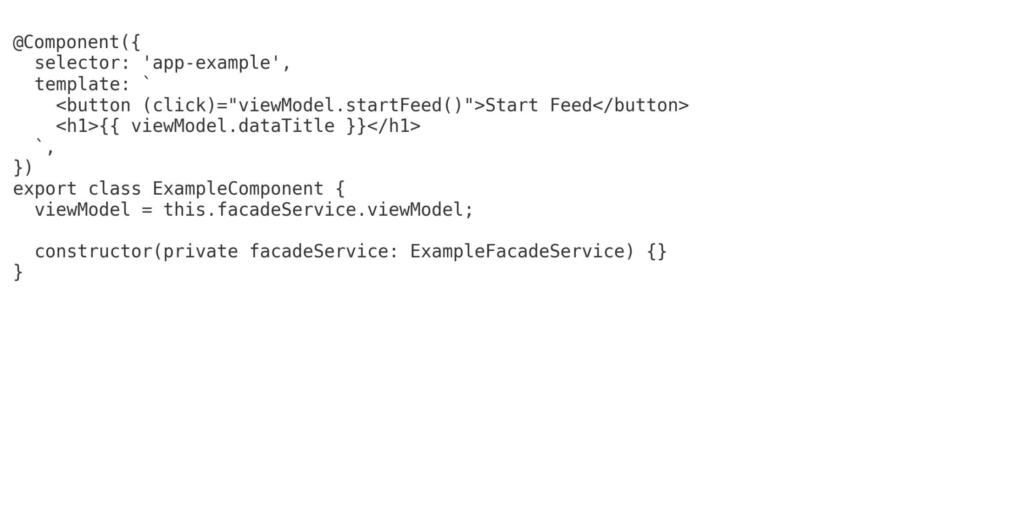
    I’ve also designed systems with complex asynchronous flows using RxJS, Angular signals, and service-based facades. On projects with real-time requirements, I’ve integrated SignalR to manage multiple live data streams. These implementations typically involve synchronising authentication, API states, and socket connections to ensure components only render when the right data is available.

    Although Angular is my primary frontend tool, my deeper value lies in understanding where complexity lives and how to manage it. I focus on making that complexity predictable and easy for teams to work with.

    Testing and Code Quality

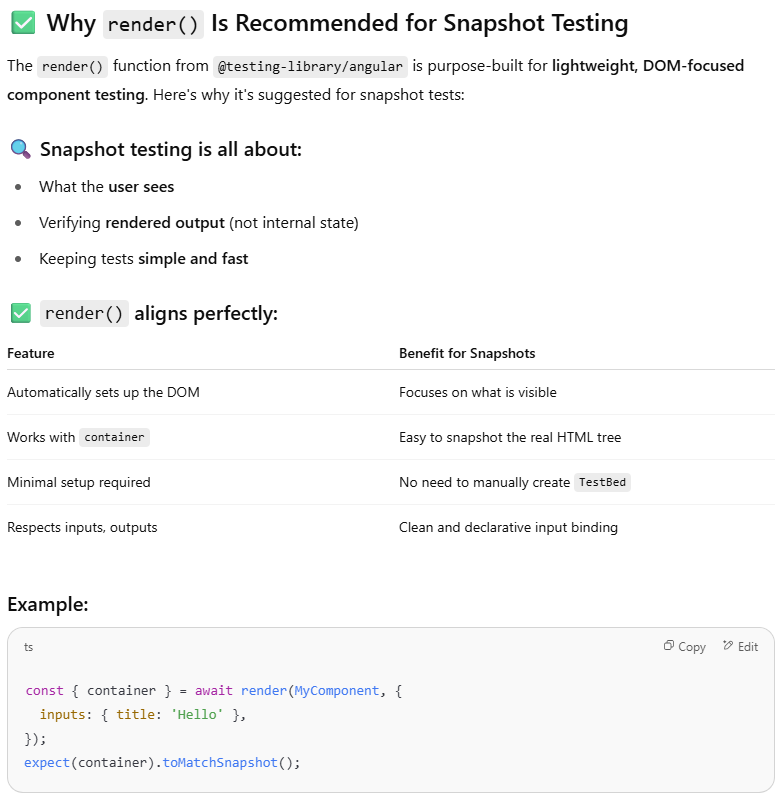
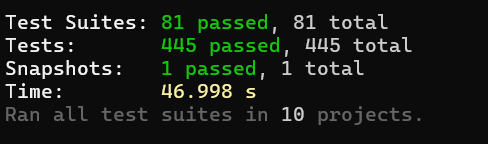
    I treat testing as a core part of development, not a separate phase. Whether using Jasmine, Jest, or writing code with testability in mind, I aim to bake quality into every layer.

    I structure components to be as lean and “dumb” as possible, using input and output bindings to keep them focused on presentation. This design makes components easier to test, easier to reuse, and easier to showcase in tools like Storybook.

    I consistently include data-testid attributes as part of my markup, not as an afterthought. These allow developers to write robust unit tests and enable QA teams to create automated scripts without chasing DOM changes. For me, writing test-friendly code means thinking about the entire lifecycle of the feature—from implementation through to testing and maintenance.

    Clean Code and Clear Thinking

    I prioritise readability over cleverness. I write small, purposeful functions, use clear naming, and separate concerns to keep complexity under control. Where appropriate, I introduce wrappers or facades early to reduce future refactor pain and keep teams focused on business logic, not boilerplate.

    The goal isn’t to write perfect code. It’s to write code that’s easy to understand for my future self, my teammates, and the business that depends on it.

    Practical, Delivery-Focused Approach

    I have strong experience delivering MVPs, scoping features, and shipping under real-world constraints. That includes:

    Collaborating with product teams to define realistic outcomes

    Delivering in small, testable increments

    Communicating technical trade-offs without jargon

    Using CI/CD pipelines, code reviews, and static analysis tools as daily habits

    I don’t just implement tickets. I solve problems with attention to quality, context, and end-user value.

    Curiosity That Drives Consistency

    Books That Shape My Thinking

    I read regularly across topics like psychology, marketing, and personal development. Books like Thinking, Fast and Slow, Atomic Habits, The Psychology of Money, and The Mom Test influence how I think about user experience, product decisions, and clear communication.

    Staying Current with the Tech Landscape

    I follow engineering blogs, changelogs, and newsletters to stay up to date without chasing trends for their own sake. I stay aware of what’s evolving—framework updates, architectural shifts, tooling improvements—and choose what to adopt with intention.

    Using AI with Intention

    AI is part of how I work, but never a replacement for real engineering judgment. I use tools like ChatGPT and x.ai to explore ideas, compare strategies, and generate variations, especially when brainstorming or drafting. I take time to test outputs, question assumptions, and validate anything that feels uncertain.

    I also design prompts to avoid echo chambers and reduce bias. For topics where AI has limitations, I follow up with practical research. AI supports my thinking—it doesn’t make decisions for me.

    What I’m Not

    Knowing what you don’t do is just as valuable as knowing what you do.

    • I’m not a trend chaser. I adopt tools when they solve problems, not because they’re new.
    • I’m not a “rockstar” developer. I favour collaboration, clarity, and consistency over complexity or bravado.
    • I’m not tied to Angular. It’s where I’ve built deep experience, but my core practices apply across frameworks.
    • I don’t just complete tasks. I think about what happens next—how it’s tested, maintained, and evolved over time.

    Conclusion: Building With Intention

    Whether I’m writing code, reviewing work, or collaborating with product teams, I bring a thoughtful, disciplined approach. I aim to write software that is not only functional, but dependable, understandable, and ready to scale.

    I’m always learning and always looking for ways to improve. If you’re building something and this approach resonates with you, feel free to reach out.

  • About Me

    About Me

    I’m a senior Angular engineer with 15+ years in software development, delivering robust, maintainable applications across enterprise, startup, and independent business environments.

    I specialise in building modern Angular frontends (Angular 2 through 18), with a strong focus on clean code, functional practices, and test-driven development. I lean on tools like facade services, DTOs, and layered abstractions early—even in MVPs—because I believe that sound structure now is cheaper than deep refactoring later.

    Recent roles have seen me lead frontend teams through architectural overhauls, moving from tech-debt-heavy monoliths to cleaner, micro frontend-style applications. I’ve introduced stateless patterns, immutability, shared component libraries, and private registries, as well as reusable web components across codebases.

    I balance delivery with thoughtful engineering, prioritising minimal, meaningful code and clear test coverage. My toolbox includes Angular signals, RxJS observables, and the ability to compose reactive logic across auth, API, and live data layers (e.g. SignalR).

    Earlier in my career, I designed full-stack systems for local businesses—everything from stock control to eCommerce to custom CMS platforms. These experiences sharpened my ability to listen to users and build exactly what’s needed.

    I’ve also mentored developers in Git, Agile, Docker, and Kubernetes, always encouraging simplicity and sustainable practices.

    Whether I’m leading a refactor or prototyping a new feature, I bring curiosity, pragmatism, and a commitment to building things that last.

  • MVP: What’s In, What’s Out — And Why I Still Use Facades

    Intro – Inspired by a PR Comment

    This post was triggered by a PR comment: ‘Isn’t this wrapper overkill for MVP?’ I’ve been there before — and I’ve learned that a little early structure saves a lot of late pain.

    Why I Stick to Facades and Wrappers From the Start

    Even when moving quickly, I find it worth using:

    • Per-feature facades** (e.g. ChatFacade, EmailFacade)
    • Per-hub gateway services** (e.g. ChatHubGateway, EmailHubGateway)
    • DTO mappers

    They:

    • Add barely any overhead at the start.
    • Keep backend transport concerns (SignalR/HTTP) isolated.
    • Make future changes predictable — especially when multiple hubs are involved.
    • Save me from pulling tangled logic out of components later.

    Even if the app doesn’t go far, it’s a minimal investment for peace of mind.

    What I Include Early (Post-MVP Stability)

    1. Per-Hub Gateway Services

    Each hub (chat, email, agent) gets its own wrapper for connection and event handling.

    @Injectable({ providedIn: 'root' })
    export class ChatHubGateway {
      #conn = new HubConnectionBuilder().withUrl('/chatHub').build();
      #msg$ = new Subject<ChatMessage>();
      message$ = this.msg$.asObservable();
    
      start() {
        this.conn.on('ReceiveMessage', m => this.msg$.next(m));
        return this.conn.start();
      }
    }

    2. Typed DTO Mapping

    I always keep backend shapes away from UI models.

    toChatMessage(dto: ChatMessageDto): ChatMessage {
      return { sender: dto.from, text: dto.content, timestamp: new Date(dto.ts) };
    }

    3. Connection Status Signals

    @Injectable({ providedIn: 'root' })
    export class EmailHubService extends SignalRHubService {
      readonly status = signal<'connected' | 'disconnected' | 'reconnecting'>('disconnected');
    
      override startConnection() {
        this.hubConnection.onreconnecting(() => this.status.set('reconnecting'));
        this.hubConnection.onreconnected(() => this.status.set('connected'));
        this.hubConnection.onclose(() => this.status.set('disconnected'));
        return this.hubConnection.start();
      }
    }

    Quick Note

    Currently my understanding about signals is that they should only be used when data is required in the template, so the “status” above should only be used for informing the end user, I would ideally separate out observable and signal data into different services, I have been using naming convention like “emailHubDataService” for all observable things and then “emailHubService” for any signal based things.

    In a component:

    @Component({ ... })
    export class EmailPanelComponent {
      readonly connectionStatus = inject(EmailHubService).status;
    }

    Now you can show:

    html
    @if(isReconnecting)
    <div>
      Attempting to reconnect...
    </div>
    
    ts
    const status = signal<'connected' | 'disconnected' | 'reconnecting'>('disconnected');
    
    isReconnecting = computed(() => status() === 'reconnecting')

    Tracking Incoming vs Outgoing Traffic

    It helps to distinguish what’s being sent to the server vs what’s coming from the server. I’ve found it useful to separate these both semantically and in logging.

    This is an area I have recently made some mistakes in and was informed that I had over engineered, (hence the inspiration for this post) I added a wrapper around the emailHubService and than added two new services to distinguish between incoming and outgoing calls, I understand now, that it was over engineered, my understanding just came from understanding the original hub services.

    Semantic distinction:

    An example of how what I wanted to achieve can be done without the separate services.

    // OUTGOING (client → server)
    sendDisconnect(...)
    sendAcceptEmail(...)
    senRejectEmail(...)
    
    // INCOMING (server → client)
    onReceiveEmailMessage(...)
    registerHandlers() // binds handlers like 'ReceiveEmailMessage'

    Logging:

    Wrap both directions to log clearly:

    // Outgoing
    send<T>(method: string, payload: T) {
      this.logger.debug(`[OUTGOING] ${method}`, payload);
      this.hubConnection?.send(method, payload);
    }
    
    // Incoming
    #handleIncoming<T>(label: string, payload: T) {
      this.logger.debug(`[INCOMING] ${label}`, payload);
    }

    This makes tracing issues between frontend and backend a lot easier, especially when events stop flowing or are being sent with unexpected payloads.

    Side Note:

    The use of the “#” syntax in place of the “private” access modifier.

    What I Leave Until Later

    I think these should wait until there’s a clear need:

    • Global state libraries (NgRx, Akita)
    • Factories for creating hubs
    • Generic event buses
    • Central hub connection manager (unless coordinating 3+ hubs)

    Observables First, Signals Later (Reminder to Self)

    A quick personal rule:

    Keep SignalR data as observables until it reaches the DOM — then convert to signals, if the template has a service, then I feel it is fine to convert it there too, just as long as it is not being reference around the rest of the codebase.

    Why?

    • Observables are better for streaming, retries, and cancellations.
    • Signals are great for UI reactivity.
    • This keeps the core data flow reactive without tying it to the DOM too early.

    Typical usage:

    @Component({ ... })
    export class ChatComponent {
      readonly messageSignal = toSignal(chatHub.message$);
    }

    Final Thought

    This isn’t about gold-plating MVPs — it’s about laying groundwork that doesn’t cost much but saves me big later.

    Even if nothing ships, I’d rather have clean wrappers and small abstractions than spend hours later undoing a spaghetti mess. If it all falls over? At least I didn’t build the mess twice.

  • Simple Jest Snapshot for Angular Component

    Simple Jest Snapshot for Angular Component

    Below is a simple jest snapshot with an interface for the list items and three signal inputs.

    Points to Note

    • The “render” function comes from the “@testing-library/angular”.
    • Not passing the second argument may cause lint errors or miss leading co-pilot suggestions.
    • Using the “render” function allows you the nice approach of setting the inputs.
    import { render } from '@testing-library/angular';
    import { QueueListComponent } from './queue-list.component';
    
    interface QueueItem {
      id: string;
      name: string;
      isSource: boolean;
      mode: string;
    }
    
    const mockQueues: QueueItem[] = [
      {
        id: '1',
        name: 'Alice Johnson',
        isSource: true,
        mode: '',
      },
      {
        id: '2',
        name: 'Bob Smith',
        isSource: false,
        mode: '',
      },
    ];
    
    describe('QueueListComponent', () => {
      it('renders consistently', async () => {
        const { container } = await           render(QueueListComponent, {
          inputs: {
            queues: mockQueues,
            primaryLabel: 'Primary Queue',
            secondaryLabel: 'Secondary Queue',
          },
        });
    
        expect(container).toMatchSnapshot();
      });
    });
    

    Elaboration on the Points Above

    Point One

    Using the “render” function for a snapshot was the suggestion of chat-gpt, it was the alternative to using the standard testbed, testbed was recommended when needing deeper integration with services and logic.

    What Chat-GPT had to say

    Point Two

    When I first got the suggestion from GPT, it did not give me the second arg (inputs in this case) and I was getting errors telling me about my component not being recognised, I initially opted for a co-pilot suggestion and it converted the component to a string containing the selector with the inputs passed in as if I was using it in a parent component, I cannot replicate this now, the second param of the “render” function is optional either way. (I wasn’t having the best day :/ )

    Point Three

    I liked that I could just declare the required inputs as shown above with “render” function options, it seems a bit cleaner than the only way I currently now when you use the “Testbed” approach.

    Signal Input from the Class

    inputData = input.required<IItem>();

    Spec File Code to Set the Input

    fixture = TestBed.createComponent(ExamplePanelComponent);
    component = fixture.componentInstance;
    
    fixture.componentRef.setInput('inputData', mockItem('Example'));

    Last Things to Remember

    To generate the snapshot, I was running “npx jest” this should highlight that your snapshot was created in green along with tests run, etc.

    This post was generated as a memory jogger, if you’ve found it, I hope it helps you out

  • From Hobbyist Sites to Principal Consultant – 15 Years of Clean-Code Front-End


    From hobbyist sites to lead engineer: my 15-year quest for clean, scalable front-end code

    1. A hobby that turned into a career (2008 – 2014)

    I started out building e-commerce sites for local shops in Warwickshire.


    Those evenings taught me that users don’t care about frameworks – they care about speed and clarity.

    Tools then: PHP, plain JavaScript, SEO on a shoestring.


    2. Shipping faster through teaching (2014 – 2020)

    At eTech Solutions I wasn’t just a senior dev – I became the in-house trainer.
    Over 5.5 years I introduced:

    • Git branching (we killed “last-day-merge” panic).
    • Agile ceremonies (stand-ups that finish on time 🕒).
    • Docker & Kubernetes POCs (cut dev-box setup from hours to minutes).

    Lesson #1: Teaching forces you to master the “why”, not just the “how”.


    3. Leaning into leadership & micro-frontends (2020)

    At Mortgage Advice Bureau I inherited a monolith drowning in technical debt.
    We reacted by:

    1. Refactoring to stateless RxJS + immutable data.
    2. Splitting the codebase into micro-frontends and private Nexus libraries.
    3. Coaching a team of three to deliver business value and raise the bar.

    Result: build times down 40 %; new features released weekly instead of monthly.


    4. Principal consultant era (2021 – 2023)

    Virgin Media TV Streaming

    • Angular + Apollo GraphQL
    • Storybook for design-system governance
    • Led six-person squad; coordinated with product, design, QA.

    Lesson #2: Clean code isn’t an aesthetic choice – it’s a performance lever.


    5. Bringing AI into the workflow (2023 → present)

    At Actify I:

    • Integrated GitHub Copilot into our review cycle – 22 % fewer low-value PR comments.
    • Built a GPT-powered Angular schematic that scaffolds unit tests; team adoption hit 90 % in two sprints.

    6. What I can do for your team (summary)

    • Framework depth: Angular 2 → 18, React, RxJS signals.
    • DevEx: CI/CD in Azure DevOps, micro-services, Storybook, Cypress.
    • AI leverage: prompt-engineering, OpenAI API, cost monitoring.
    • Leadership: mentoring, standards, outcome-first agile.

    7. Let’s talk

    I’m open to permanent or contract roles where clean code, functional patterns and AI-assisted delivery matter.
    👉 Linkedin

  • Angular Signals and Observables: A Clean Pattern for Managing State

    Introduction

    In modern Angular applications, handling reactive data streams efficiently is crucial. This pattern ensures:

    • Separation of concerns – Data fetching and UI reactivity are managed separately.
    • Optimised reactivity – Using signals to prevent unnecessary UI updates.
    • Scalability – A structured approach that can be extended with facades if needed.

    This post presents a pattern using two services:

    1. A data service that fetches and exposes data via observables.
    2. A signal-based service that converts the observable into a signal for UI components.

    Note: When I wrote this post, I was working on a team that did not want observables in components. To handle this, you could introduce a facade service that wraps everything in signals—including the startFeed observable—and expose it via a view model. The component would then trigger the data flow by calling a signal function in the template.


    1. Data Service: Handling the Data Fetching

    This service is responsible for fetching data and exposing an observable.

    Key Points:

    • startFeed() fetches data and updates the BehaviorSubject.
    • listen() exposes the current state as an observable for external consumers.

    2. Signal Service: Converting the Observable into a Signal

    This service wraps the observable into a signal and provides derived signals for specific properties.

    Key Points:

    • toSignal() creates a reactive signal from the observable.
    • Computed signals ensure only necessary properties are exposed.
    • startFeed() is exposed so it can be subscribed to in the template using async.

    3. Using the Signal Service in a Component

    The component subscribes to “ using the async pipe, ensuring it follows reactive best practices.

    Key Points:

    • start() assigns feed$ to startFeed() and binds it in the template using async.
    • dataTitle is a signal, meaning it updates automatically when new data arrives.

    Alternative Approach: Using a Facade Service

    If you don’t want observables in the component, you could introduce a facade service that exposes everything as signals—including the startFeed() observable wrapped inside a signal.

    Then, in the component:

    This approach keeps all observable logic out of the component while maintaining a clean reactive API.


    Conclusion

    This pattern provides:

    Separation of concerns – Data fetching, state management, and UI logic are cleanly divided.

    Optimised rendering – UI only updates when necessary.

    Flexibility – Works with or without observables in the component.